
When a first aider initially arrives at the scene of an incident, the worst thing they can do for everyone involved is to rush straight in. That is not to say that fast action isn’t essential. First, the responder must assess the situation in front of them. This assessment is known as the Primary Survey.
Of course, to protect their safety, and best help their patients, it is essential that first aiders know about each stage of the survey. Happily, the acronym DRABC or DR ABC, as it is also known, can help here, a topic which you can read more about below.
Last reviewed: September 2026 — checked against Resuscitation Council UK Guidelines 2025.
If you would like to further your first aid skills we also offer a range of first aid courses.
Learn First Aid Skills Online From Only £14 with Online CPD Academy – click here for further information.
Please note: the video above was produced before the Resuscitation Council UK Guidelines 2025 and shows the older calling sequence, in which the 999 call is made after checking for breathing. Where the video and the written steps below differ, follow the written steps — under the current guidance you call 999 as soon as you find the casualty unresponsive.
What does DRABC stand for?
DRABC is the acronym for the steps in the primary survey procedure that every first aider must complete when they initially come across a casualty. DRABC stands for Danger, Response, Airway, Breathing and Circulation. One important point before we start: under the Resuscitation Council UK Guidelines 2025, the 999 call is made as soon as you find that a casualty is unresponsive — that is, at the end of the Response stage, before you check the Airway and Breathing. The acronym is unchanged, but think of it as D – R – (call 999) – A – B – C. Although, there is some debate as to whether this is enough steps in some cases. An issue we will get into more detail about later on.
What is the DRABC procedure?
Most people complete the basic DRABC procedure in the order that follows:
Step one: Danger
Before anything else, it is vital that a first aider assess the overall danger of the situation, and whether it is safe for them or any other person to be in it. After all, a first responder cannot help a casualty if they become injured. Not doing a danger assessment could even mean risking their own life and putting additional strain on the emergency service once they arrive. Something that can interfere with the treatment the casualty receives.
For example: If a casualty is in an accident in a vehicle on the motorway, the primary danger here would be other traffic. Therefore, the traffic would need to be stopped before attending to the casualty. Only after you have confirmed that there is no danger can you approach and assess the casualty.

Step 2: Response
The second step isn’t about the first aiders response, but about whether the casualty can respond and provide information about their condition.
It is a very valuable stage, as even no-response will inform the first aider about the seriousness of their casualty’s condition.
To help you properly conduct step 2, use the mnemonic AVPU:
- Alert: Check to see if the casualty is alert and conscious. Are they talking or moving? If the answer is no, progress to the V stage below.
- Voice: Speak to the casualty in a loud voice. Be sure to be in their eye line when you do this. If the casualty does not respond, progress to stage P below.
- Pain: If there is still no response to voice, check for a response to a painful stimulus. Gently squeeze the muscle at the top of the shoulder (the trapezius) or pinch an earlobe, and watch for any reaction such as movement, a sound or the eyes opening. Avoid shaking the casualty, especially if a head, neck or spinal injury is possible. If you get no response, continue to stage U.
- Unresponsive: Once you have completed the steps above with no response, you can class the casualty as unresponsive.
Call 999 now — for any unresponsive casualty. Under the Resuscitation Council UK Guidelines 2025, you should no longer wait until you have checked their breathing before phoning. As soon as you establish that the casualty is unresponsive:
- Ideally, ask a bystander to call 999 while you continue the survey.
- If you are on your own, make the call yourself. Activate your phone’s speaker function so your hands stay free, and carry on with the Airway and Breathing checks below while you wait for the call to be answered.
- The ambulance service call handler will support you throughout — including helping you decide whether the casualty’s breathing is normal and whether to start CPR.
Note: Since October 2025, the Resuscitation Council UK and European Resuscitation Council recommend the updated ACVPU scale, which adds a C for new or worsening Confusion between the Alert and Voice stages. AVPU is still widely taught, but ACVPU reflects the current guidance.
Step 3: Airways
Once you have established that their casualty is unresponsive (and the 999 call has been started), you must check their airway. The airway is a critical step because, at this point, you will be looking to find out why the casualty is unresponsive.
To check your casualty’s airway, place them on their back. Put one hand on their forehead and gently tilt their head back, then place two fingertips under the point of their chin and lift it. This head tilt and chin lift opens the airway.
Step 4: Breathing
Now you have opened your casualty’s airway, spend no more than 10 seconds checking for signs of normal breathing — you can do this while you wait for the 999 call to be answered. Occasional gasps, or slow, noisy or laboured breathing are not normal breathing: they are signs of cardiac arrest. If the casualty is not breathing, or not breathing normally, go to step 5. If you are unsure, the ambulance call handler will help you decide.
If the casualty is unconscious, but breathing normally, put them in the recovery position (when it is safe to do so) and keep checking their breathing until help arrives.
Step 5: Circulation – start CPR
If your casualty is not breathing normally, start CPR straight away — you have already called 999 at the Response stage, so there is nothing to delay you. If you are not trained in rescue breaths, or are unwilling to give them, perform continuous chest compressions without stopping (hands-only CPR); the call handler will talk you through it. Also, instruct those around you to fetch an AED while you administer CPR, and use it as soon as it arrives.
Additional steps
Above you can find the basic DRABC steps to be used in the primary survey. However, it is worth noting that some people use an enhanced version known as DR C ABCDEFG. The DR C ABCDEFG method is similar to the hospital care model adapted for first responders.
The benefits of the added steps include a more detailed assessment and an increased focus on preventing further injury and promoting recovery as well as just preserving life.
Learn First Aid Skills Online From Only £14 with Online CPD Academy – click here for further information.
DR C ABCDEFG
Stage 2.1 – C for life-threatening bleeding
Between the response and the airways stages comes stage 2.1, checking for life-threatening bleeding (previously known as “catastrophic haemorrhage” — the Health and Safety Executive’s first aid guidance, L74, now uses the term life-threatening bleeding). The reason being that severe blood loss can kill quickly and needs to be stemmed before dealing with issues of airways, breathing, and circulation.
Life-threatening bleeding may be rapidly flowing or spurting blood, blood pooling on the ground, or bleeding that cannot be controlled by direct pressure alone. Apply firm, direct pressure to the wound first. Where direct pressure alone is not enough, a tourniquet (for a limb wound) or haemostatic dressings and wound packing may be needed — HSE L74 (2024) lists these as items for workplace first aid kits where the risk has been identified, and their use as an additional training need. If your workplace risk assessment identifies a risk of life-threatening bleeding, make sure first aiders are trained in these techniques and the kit is available.
Step 6 – D for Defibrillator
Some people combine step 5 with asking for a Defibrillator while others regard it as a stage of its own. Indeed, you must instruct other people around you to get an Automated External Defibrillator – AED, while you are attending to the casualty.
Fortunately, these are now available in many public places, including airports and shopping centres and can help diagnose several serious conditions as well as administer treatment for them. Anyone can use an AED — no training is needed. When you do use an AED, it is important to know the proper placement of defib pads.
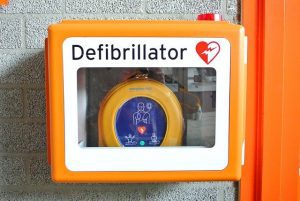
For others using a more extended model, D stands for damage. The idea is that this step to identify the extent of the casualty’s injuries and where possible stabilise them.
Step 6: E for Everything else
Yes, ‘everything else’ seems a little broad. However, it can be broken down into three further Es – evaluate ABCDs, endocrine blood glucose (blood sugar), and environment. This step aims to prevent further issues as opposed to treatment.
Step 7 – F for Flip
Yes, we have mentioned the recovery position before, but once again some models separate it into its stand-alone step. It’s also a good reminder to change the position of your casualty if it is both appropriate, and they have started to breathe independently.
Step 8 – G for Get help
Finally, the very last stage is to get help. Although, if your casualty was unresponsive, you would have already called 999 at the Response stage.
However, this more extended model also accommodates conscious casualties. If your casualty is conscious, breathing, and in no immediate life-threatening danger, collecting information first and then contacting the appropriate services can be preferable.
Of course, whether a first responder will choose to use DRABC or the extended version will depend on their level of training, and the particular incident they are attending.
Skills Training Group offer a range of first aid courses. If you’d like further information on these courses, call us on 0808 164 2780.
Download your free information pack
Find out how you could train as a domestic gas engineer by downloading a free copy of our information pack.
Become a qualified gas engineer
Our New Entrant Gas Engineer courses take you from beginner to Gas Safe registered, with hands-on training and the ACS qualifications employers look for.
Blog categories
Keep up to date with the latest news from
Skills training group.